DIY Tie-Dye
Hey guys! I know it's been a while since I've had a new post, but I have been extremely busy with school and a moving situation. Now I finally have some free time, so I am going to show you guys how I tie-dye. :)
First things first you are going to need a few things:
1. Actual tie-dye
2. Squirt bottles to hold the dye (mine are hair dye bottles from Sally's)
3. Salt
4. Rubber Bands
5. Piece of clothing that is white and 100% cotton
6. Trash bag
7. Ziploc bag or a grocery bag (make sure there are no holes in it)
8. Plastic gloves
9. Wear clothes you don't mind getting dirty
10. A place outside to do the job
So what you want to do first is set everything up. Take your trash bag and do not open it, leave it the it is and lay it down flat outside (I put mine on the grass). Next thing you want to do is get your piece of clothing ready, I am doing a shirt in this tutorial.
Lay your shirt down flat.
Then you are going to take your index finger and thumb and pinch in the very middle and start turning it. It doesn't matter which way you turn it, it will still be a spiral.
Keep turning your shirt in a circular motion.
After you have turned it a couple times it should look like this.
Now take your rubber bands and put them around the shirt. When you have them on the shirt make sure they are even, the sections between each rubber band of the shirt is where you are putting the dye. Depending on how many rubber bands you use, will depend on how many different colors/colors of sections you have. The shirt below I was using two different colors, and I made another shirt with three rubber bands, using two colors then mixing the two colors together, so in total three colors. Your shirt should look like this when you are done putting the rubber bands on.
After you have the shirt done, go ahead and put it outside on your trash bag.
Next get your dye ready.
I am using the same dye as I did in my other post about big/little gifts.
You are going to pour the dye into the squirt bottles at about the halfway point for the 1 oz. line, as you can kind of see in the picture below.
Next you are going to add salt, yes salt. I usually eyeball it here, but usually I put a teaspoon to teaspoon and a half in it.
Next you are going to put HOT water in the bottles, up to the 8 oz. line.
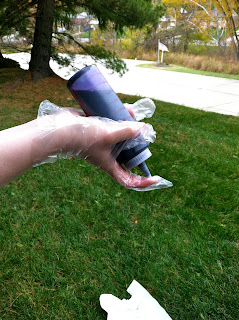
As soon as you have water in all of your dye bottles take them out immediately with your plastic gloves on. Put your index finger on top of squirt hole and shake the bottle. Make sure you are doing this over grass because some might come out when you are shaking it.
After all the dry dye is mixed in bottle it is time to put the dye to work!
Squirt the dye in one rubber band section and go straight across to the other section to put the same color dye on it. It should look like this, shown in the picture below.
It doesn't matter if you accidentally get dye in another section, it all turns out fine in the end! Put the different color dyes in all of the sections the same way straight across.
Here are all the pictures I took when I was actually putting the dye on the shirts.
I did two shirts, one I did just pink dye on it and the other I did pink, purple, then pink and purple mixed together. Once you are done putting the dye on your shirts, you are going to put them in a ziploc or grocery bag. It should look like this.
Tie the bags closed, then wait for two hours for the dye to set in. You can wait longer if you want, but I have never really waited more than two hours.
Once two hours has passed you are going to take your shirts to your washing machine. You need to have it set on your lowest load size and have the water temperature set to cool or warm.
Put the shirts in the washing machine without any detergent, let it run with just the water in it.
If you get any dye on your washing machine, just simply take a wet paper towel and wipe it up. Let the washing machine do its work, once it is done, just throw your shirt into the dryer and dry it how your normally would for a cotton shirt.
Once your shirt is dry it should look like this!
Hope you all start tie-dying soon, cause seriously it's so easy! :)


Comments
Post a Comment